Difference between revisions of "DSP"
(→Preparing your height field data: adding examples) |
(→Preparing your height field data: adding examples) |
||
| Line 7: | Line 7: | ||
== Preparing your height field data == | == Preparing your height field data == | ||
| − | + | The DSP takes unsigned short (16-bit) integer data. Our various command-line data converters can help bring data in from pretty much any existing format, including image data, via various processing commands. If the data was in png image format, for example (which is basically 3-channel 8-bit integer data), the data could be prepared with a combination of 'png-pix', 'pix-bw', and 'cv'. | |
| − | The data format for the DSP primitive is network-ordered unsigned short integers. BRL-CAD has a couple of dozen tools that you can use for converting existing data into that raw format, such as the 'cv' command or the 'bw-d' and 'd-u' commands among other similar tool chains. If you use the cv command, the output format is "nus" for network unsigned shorts. | + | If you type the 'in' command, it will prompt you for each parameter individually and that should help some. For the DSP, the main parameters are: the source of the height data, the width (number of points in the Y direction) and length (number of points in the X direction) of the input data, width/length/height scaling factors, and whether to smoothly interpolate between cells (0 = do not interpolate, 1 = interpolate). |
| + | |||
| + | See the 'dsp_add' tool for combining two existing DSP data files into one. | ||
| + | |||
| + | A DSP primitive is an array of cells initially defined by points in the XY plane as positive heights from Z = 0. The DSP can then be transformed to other orientations and positions. The number of cells is (numX * numY). | ||
| + | |||
| + | The data format for the DSP primitive is network-ordered unsigned short integers (nu16). BRL-CAD has a couple of dozen tools that you can use for converting existing data into that raw format, such as the 'cv' command or the 'bw-d' and 'd-u' commands among other similar tool chains. If you use the cv command, the output format is "nus" for network unsigned shorts. | ||
An example black and white (gray scale) image (png format): | An example black and white (gray scale) image (png format): | ||
| Line 24: | Line 30: | ||
$ png-bw Class65-150h.png > Class65-150h.bw | $ png-bw Class65-150h.png > Class65-150h.bw | ||
| − | Convert it to the format required for a dsp file: | + | View the result: |
| + | |||
| + | $ bw-fb -w142 -n150 Class65-150h.bw | ||
| + | |||
| + | Convert it to the format required for a dsp file (nu16): | ||
| − | $ cv huc | + | $ cv huc nu16 Class65-150h.bw Class65-150h.dsp |
And use it to create a dsp object: | And use it to create a dsp object: | ||
| Line 32: | Line 42: | ||
mged> in dsp.s dsp f Class65-150h.dsp 142 150 0 ad 1 0.005 | mged> in dsp.s dsp f Class65-150h.dsp 142 150 0 ad 1 0.005 | ||
| − | You can play around with the scaling factors to improve the looks of the image. | + | Now raytrace it: |
| + | |||
| + | mged> B dsp.s | ||
| + | mged> ae 45 45 | ||
| + | mged> rt | ||
| + | |||
| + | You should see something like this: | ||
| + | |||
| + | [[Image:Dsp.png]] | ||
| + | |||
| + | You can play around with the scaling factors (the end pair: 1 - cell width, 0.005 - cell height) to improve the looks of the image. | ||
Now use a color png file: | Now use a color png file: | ||
| + | [[Image:Cs-24-150h.png]] | ||
| + | |||
| + | Run the 'file' command on it: | ||
| + | |||
| + | $ file Cs-24-150h.png | ||
| + | Cs-24-150h.png: PNG image, 152 x 150, 8-bit/color RGBA, non-interlaced | ||
| + | |||
| + | Convert it to a pix file (one pixel is defined by three unsigned chars): | ||
| + | |||
| + | $ png-pix Cs-24-150h.png > Cs-24-150h.pix | ||
| + | View the result: | ||
| + | $ pix-fb -w152 -n150 Cs-24-150h.pix | ||
| − | + | Convert it to a bw file (one pixel is one unsigned char): | |
| + | |||
| + | $ pix-bw Cs-24-150h.pix > Cs-24-150h.bw | ||
| + | |||
| + | View the result: | ||
| + | |||
| + | $ bw-fb -w152 -n150 Cs-24-150h.bw | ||
| + | |||
| + | Convert it to the format required for a dsp file: | ||
| + | |||
| + | $ cv huc nu16 Cs-24-150h.bw Cs-24-150h.dsp | ||
| + | |||
| + | And use it to create a dsp object: | ||
| + | |||
| + | mged> in dsp2.s dsp f Cs-24-150h.dsp 152 150 0 ad 1 0.005 | ||
| + | |||
| + | Now raytrace it: | ||
| + | |||
| + | mged> B dsp2.s | ||
| + | mged> ae 45 45 | ||
| + | mged> rt | ||
| + | |||
| + | You should see something like this: | ||
| − | + | [[Image:Dsp2.png]] | |
| − | + | Again, you could play with various parameters to get the desired look. | |
== Importing DSP data into a .g file == | == Importing DSP data into a .g file == | ||
== Rendering your DSP == | == Rendering your DSP == | ||
Revision as of 13:42, 6 June 2012
Contents
Displacement (DSP) map primitive
Creating a DSP object
Preparing your height field data
The DSP takes unsigned short (16-bit) integer data. Our various command-line data converters can help bring data in from pretty much any existing format, including image data, via various processing commands. If the data was in png image format, for example (which is basically 3-channel 8-bit integer data), the data could be prepared with a combination of 'png-pix', 'pix-bw', and 'cv'.
If you type the 'in' command, it will prompt you for each parameter individually and that should help some. For the DSP, the main parameters are: the source of the height data, the width (number of points in the Y direction) and length (number of points in the X direction) of the input data, width/length/height scaling factors, and whether to smoothly interpolate between cells (0 = do not interpolate, 1 = interpolate).
See the 'dsp_add' tool for combining two existing DSP data files into one.
A DSP primitive is an array of cells initially defined by points in the XY plane as positive heights from Z = 0. The DSP can then be transformed to other orientations and positions. The number of cells is (numX * numY).
The data format for the DSP primitive is network-ordered unsigned short integers (nu16). BRL-CAD has a couple of dozen tools that you can use for converting existing data into that raw format, such as the 'cv' command or the 'bw-d' and 'd-u' commands among other similar tool chains. If you use the cv command, the output format is "nus" for network unsigned shorts.
An example black and white (gray scale) image (png format):
Run the 'file' command on it:
$ file Class65-150h.png
Class65-150h.png: PNG image, 142 x 150, 8-bit gray+alpha, non-interlaced
Convert it to a bw file (one pixel is one unsigned char):
$ png-bw Class65-150h.png > Class65-150h.bw
View the result:
$ bw-fb -w142 -n150 Class65-150h.bw
Convert it to the format required for a dsp file (nu16):
$ cv huc nu16 Class65-150h.bw Class65-150h.dsp
And use it to create a dsp object:
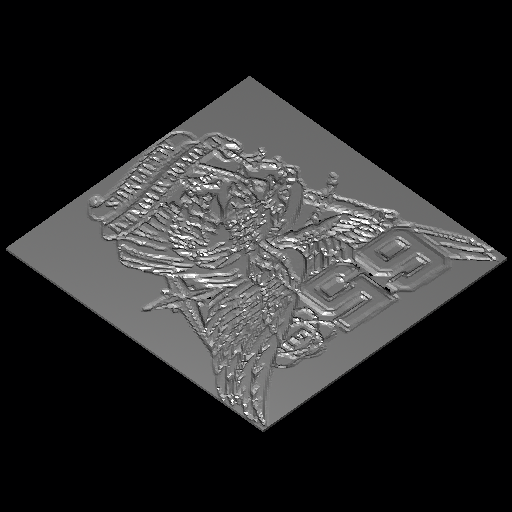
mged> in dsp.s dsp f Class65-150h.dsp 142 150 0 ad 1 0.005
Now raytrace it:
mged> B dsp.s
mged> ae 45 45
mged> rt
You should see something like this:
You can play around with the scaling factors (the end pair: 1 - cell width, 0.005 - cell height) to improve the looks of the image.
Now use a color png file:
Run the 'file' command on it:
$ file Cs-24-150h.png
Cs-24-150h.png: PNG image, 152 x 150, 8-bit/color RGBA, non-interlaced
Convert it to a pix file (one pixel is defined by three unsigned chars):
$ png-pix Cs-24-150h.png > Cs-24-150h.pix
View the result:
$ pix-fb -w152 -n150 Cs-24-150h.pix
Convert it to a bw file (one pixel is one unsigned char):
$ pix-bw Cs-24-150h.pix > Cs-24-150h.bw
View the result:
$ bw-fb -w152 -n150 Cs-24-150h.bw
Convert it to the format required for a dsp file:
$ cv huc nu16 Cs-24-150h.bw Cs-24-150h.dsp
And use it to create a dsp object:
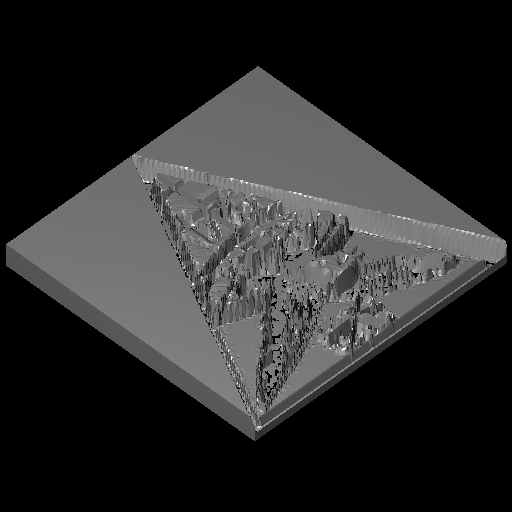
mged> in dsp2.s dsp f Cs-24-150h.dsp 152 150 0 ad 1 0.005
Now raytrace it:
mged> B dsp2.s
mged> ae 45 45
mged> rt
You should see something like this:
Again, you could play with various parameters to get the desired look.

