Difference between revisions of "Tutorial/Shaders"
BrendenD15 (talk | contribs) |
BrendenD15 (talk | contribs) m (Re sized ShadersShot3.png) |
||
| (2 intermediate revisions by the same user not shown) | |||
| Line 6: | Line 6: | ||
1.Create the model (in our case a sphere: my.sph) and save it as a combination/region(sph.r). | 1.Create the model (in our case a sphere: my.sph) and save it as a combination/region(sph.r). | ||
| − | [[image: ShadersShot1.png | | + | [[image: ShadersShot1.png | Create a Sphere Using MGED]] |
2. Go to the “Edit” button on your Graphics Window/Command Window then click “Combination Editor” button. | 2. Go to the “Edit” button on your Graphics Window/Command Window then click “Combination Editor” button. | ||
| + | |||
| + | [[image: ShadersShot2.png | MGED Edit Menu]] | ||
3. A new window will open. Hit the button on the right of the Name zone, click “Select from all” and chose the region you want to edit. | 3. A new window will open. Hit the button on the right of the Name zone, click “Select from all” and chose the region you want to edit. | ||
| + | |||
| + | [[image: ShadersShot3.png | Combination Editor | 474.75px]] | ||
4. Hit the “Show Shader” button. | 4. Hit the “Show Shader” button. | ||
| + | |||
| + | [[image: ShadersShot4.png | Show Shader]] | ||
5. The window will change and you will be able to see the appearance properties of your region. Default shader for unspecified geometry is “plastic”. You can edit it by choosing from the list that opens if you click the button on the right of the shader zone. | 5. The window will change and you will be able to see the appearance properties of your region. Default shader for unspecified geometry is “plastic”. You can edit it by choosing from the list that opens if you click the button on the right of the shader zone. | ||
| Line 19: | Line 25: | ||
(sph.r is the example model. Where sph.r is written you should write your models name.) | (sph.r is the example model. Where sph.r is written you should write your models name.) | ||
| + | |||
| + | [[image: ShadersShot5.png | Raytracing in MGED | 508.5px]] | ||
| − | Default: | + | '''Default:''' |
| − | + | ||
| + | [[image: ShadersShot6.png | Default Raytraced Sphere | 391.5px]] [[image: ShadersShot7.png | Modifying Attributes]] [[image: ShadersShot8.png | Object Properties]] | ||
6. Change the Transparency, mirror reflectance, Specular reflectivity, Difuse reflectivity, Refractive index, Extinction, Shininess and Emission values, raytracing at the same time, so you can find the shader you want. | 6. Change the Transparency, mirror reflectance, Specular reflectivity, Difuse reflectivity, Refractive index, Extinction, Shininess and Emission values, raytracing at the same time, so you can find the shader you want. | ||
| − | + | '''Blue mirror:''' | |
| − | |||
| − | |||
| − | Blue mirror: | ||
| + | [[image: ShadersShot9.png | Blue Mirror Attributes]] | ||
| + | [[image: ShadersShot10.png | Blue Mirror | 391.5px]] | ||
7. If you want to apply more then one material property you can choose stack from the list. Use the “Add shader” button to add as many shaders you want. | 7. If you want to apply more then one material property you can choose stack from the list. Use the “Add shader” button to add as many shaders you want. | ||
| − | |||
| − | Example | + | [[image: ShadersShot11.png | Add Shader]] |
| + | |||
| + | |||
| + | '''Example:''' | ||
| + | [[image: ShadersShot12.png | Set up Shader | 391.5px]] [[image: ShadersShot13.png | New Settings Example | 391.5px]] | ||
You should note that the ordering of the shaders matter. | You should note that the ordering of the shaders matter. | ||
If you change their order... | If you change their order... | ||
| − | + | ||
| + | [[image: ShadersShot14.png | Different Order | 391.5px]] | ||
| + | |||
You get... | You get... | ||
| + | |||
| + | [[image: ShadersShot15.png | New Example | 391.5px]] | ||
Here you can find an Introduction to MGED and Shaders presentation: [[Documentation]] | Here you can find an Introduction to MGED and Shaders presentation: [[Documentation]] | ||
Latest revision as of 13:33, 12 January 2013
Shaders[edit]
A shader is a way to assign visual material properties to geometry. They are applied to regions.
To apply a shader to a specific region:
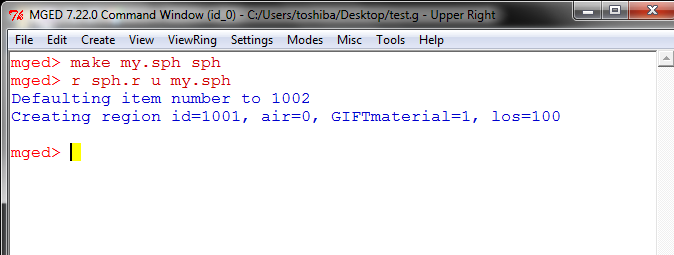
1.Create the model (in our case a sphere: my.sph) and save it as a combination/region(sph.r).
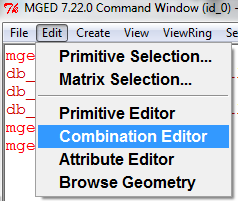
2. Go to the “Edit” button on your Graphics Window/Command Window then click “Combination Editor” button.
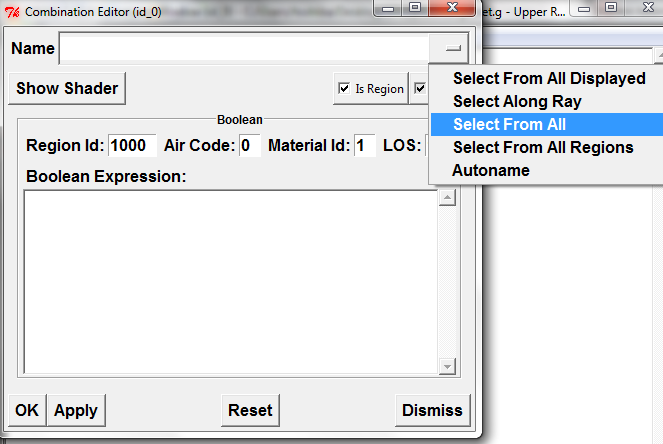
3. A new window will open. Hit the button on the right of the Name zone, click “Select from all” and chose the region you want to edit.
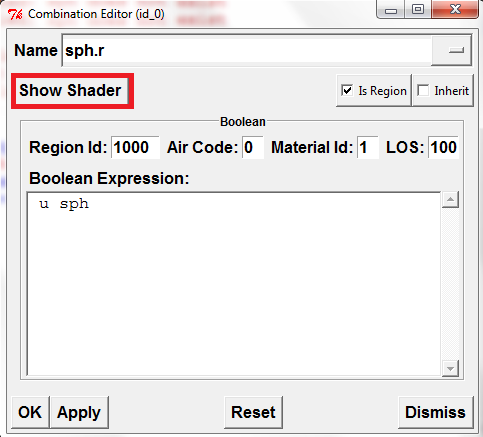
4. Hit the “Show Shader” button.
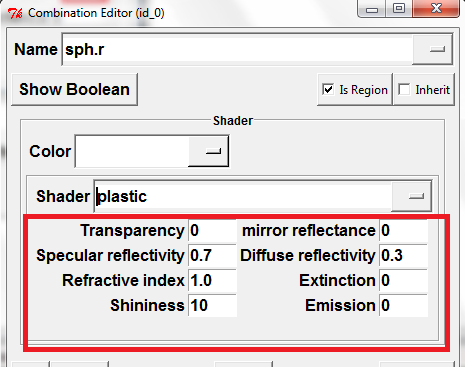
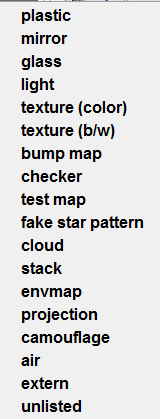
5. The window will change and you will be able to see the appearance properties of your region. Default shader for unspecified geometry is “plastic”. You can edit it by choosing from the list that opens if you click the button on the right of the shader zone.
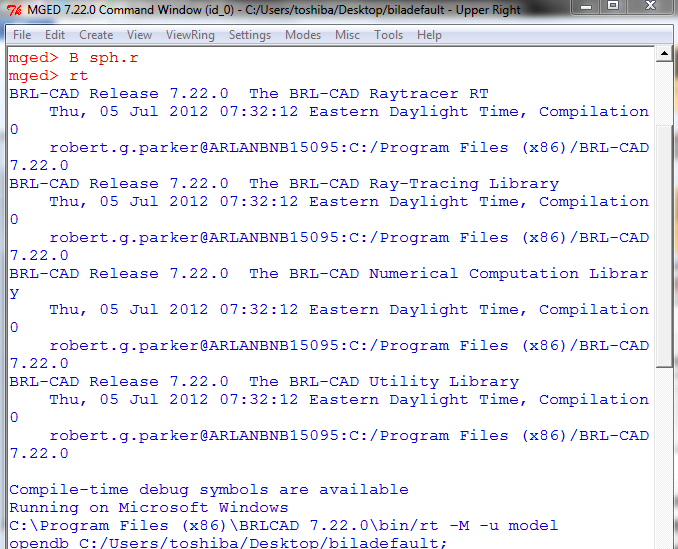
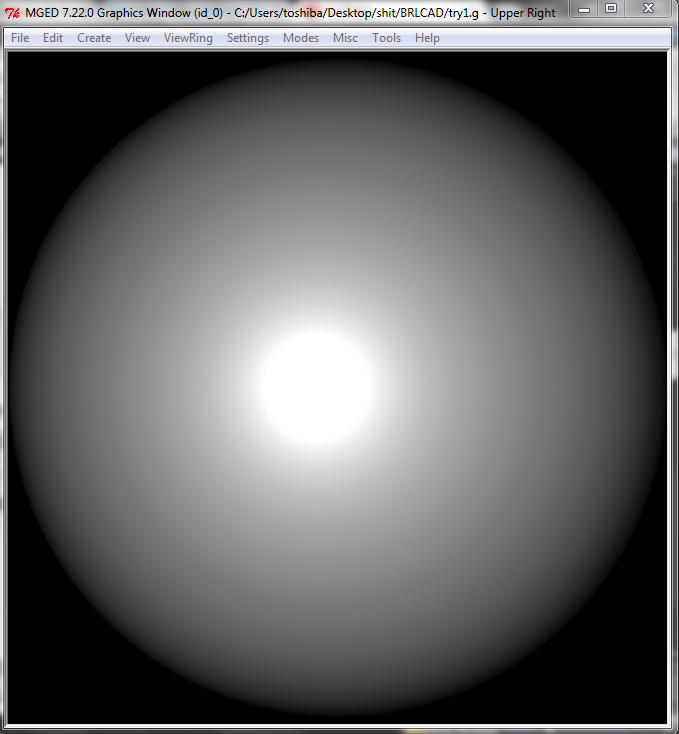
For you to get the 3D shape you have to raytrace your model. To do that you must write in the Command Window “B sph.r” and then “rt”, after avery change you make to your model. A new window will open with the raytraced model.
(sph.r is the example model. Where sph.r is written you should write your models name.)
Default:
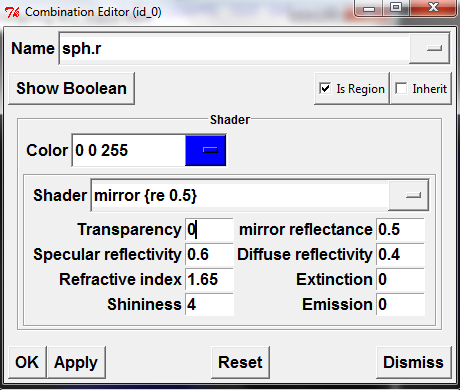
6. Change the Transparency, mirror reflectance, Specular reflectivity, Difuse reflectivity, Refractive index, Extinction, Shininess and Emission values, raytracing at the same time, so you can find the shader you want.
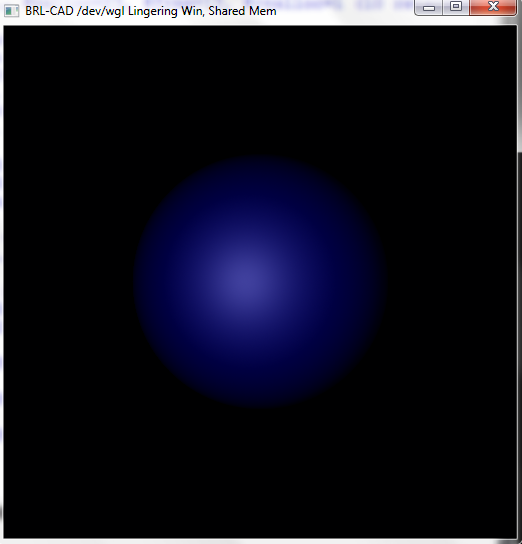
Blue mirror:
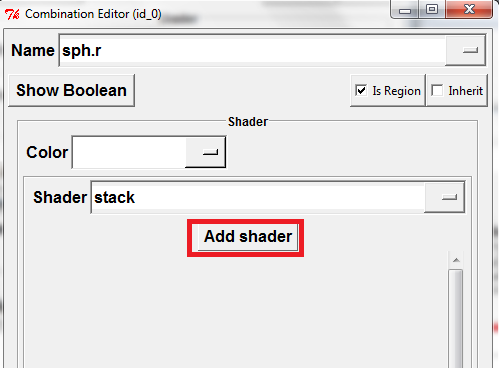
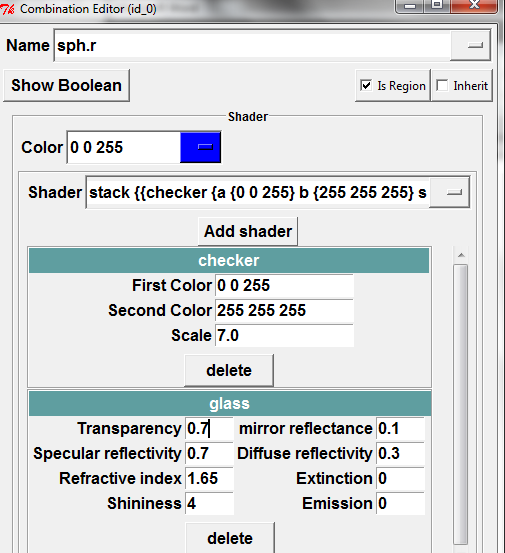
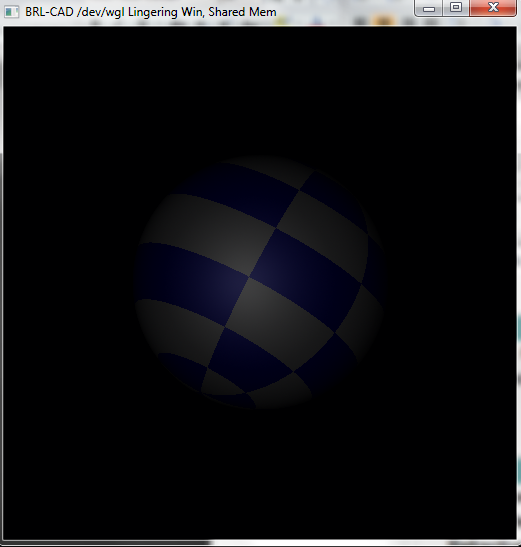
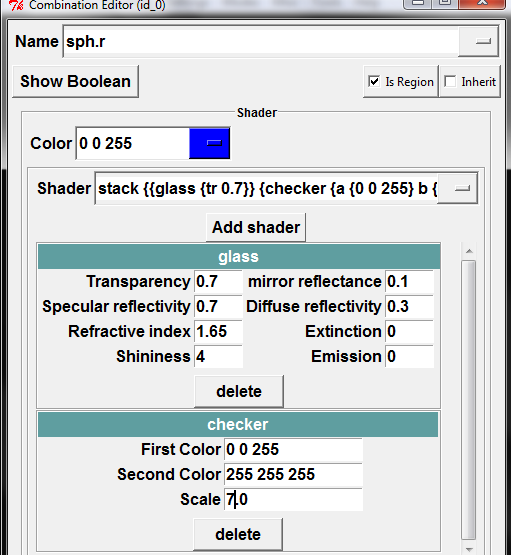
7. If you want to apply more then one material property you can choose stack from the list. Use the “Add shader” button to add as many shaders you want.
Example:
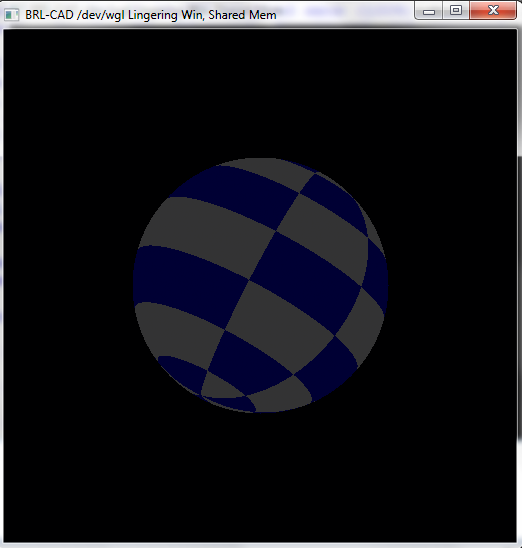
You should note that the ordering of the shaders matter.
If you change their order...
You get...
Here you can find an Introduction to MGED and Shaders presentation: Documentation
