Difference between revisions of "Compiling/Eclipse"
Jasonspriggs (talk | contribs) (GCI Task 8038207) |
(clean up) |
||
| (One intermediate revision by one other user not shown) | |||
| Line 1: | Line 1: | ||
| − | + | This tutorial shows how to set up and use Eclipse for compiling and running BRL-CAD. BRL-CAD uses the CMake build system so it can generate project files for a number of different development environments. Here we show you how to create a project using the Eclipse CDT4 generator. | |
| − | At first we need to run CMake, and set ”Where is the source code” and “Where to build the binaries”, but before | + | Note that you can [[Compiling/Eclipse/Manually|manually set up an Eclipse project]] for BRL-CAD, though there are several substantial differences in the result. |
| + | |||
| + | At first we need to run CMake, and set ”Where is the source code” and “Where to build the binaries”, but before that you have to be sure that you have a ''CMakeLists.txt'' file in the src directory . Your project name should be different from your executable name and different from your build folder name. Otherwise, Eclipse will NOT pick up your executable as you build them. Our second work is that to select the generator(the window ''cmake-gui'' appears when you click '''Generate'''), in our case – Eclipse. | ||
[[Image:Compiling-Eclipse-1.PNG]] | [[Image:Compiling-Eclipse-1.PNG]] | ||
| − | For Eclipse is important that the build directory | + | For Eclipse, it is important that the build directory not to be a subdirectory of the source directory due to a CMake limitation. |
[[Image:Compiling-Eclipse-2.PNG]] | [[Image:Compiling-Eclipse-2.PNG]] | ||
| − | In the next step you have to run Eclipse and import new project. | + | In the next step you have to run Eclipse and import your new project. |
''File/Import/General/ Existing Projects into Workspace'', Then just click '''Next'''. | ''File/Import/General/ Existing Projects into Workspace'', Then just click '''Next'''. | ||
| Line 18: | Line 20: | ||
[[Image:Compiling-Eclipse-4.PNG]] | [[Image:Compiling-Eclipse-4.PNG]] | ||
| − | + | Next, we could build everything, but here we build pieces of the project with the ''benchmark'' and ''mged'' targets. First, the BRL-CAD benchmark: | |
''Project/Make Target/Build...'', then select target:''benchmark''(location ''bench'') and click '''Build''' | ''Project/Make Target/Build...'', then select target:''benchmark''(location ''bench'') and click '''Build''' | ||
Latest revision as of 09:58, 17 December 2012
This tutorial shows how to set up and use Eclipse for compiling and running BRL-CAD. BRL-CAD uses the CMake build system so it can generate project files for a number of different development environments. Here we show you how to create a project using the Eclipse CDT4 generator.
Note that you can manually set up an Eclipse project for BRL-CAD, though there are several substantial differences in the result.
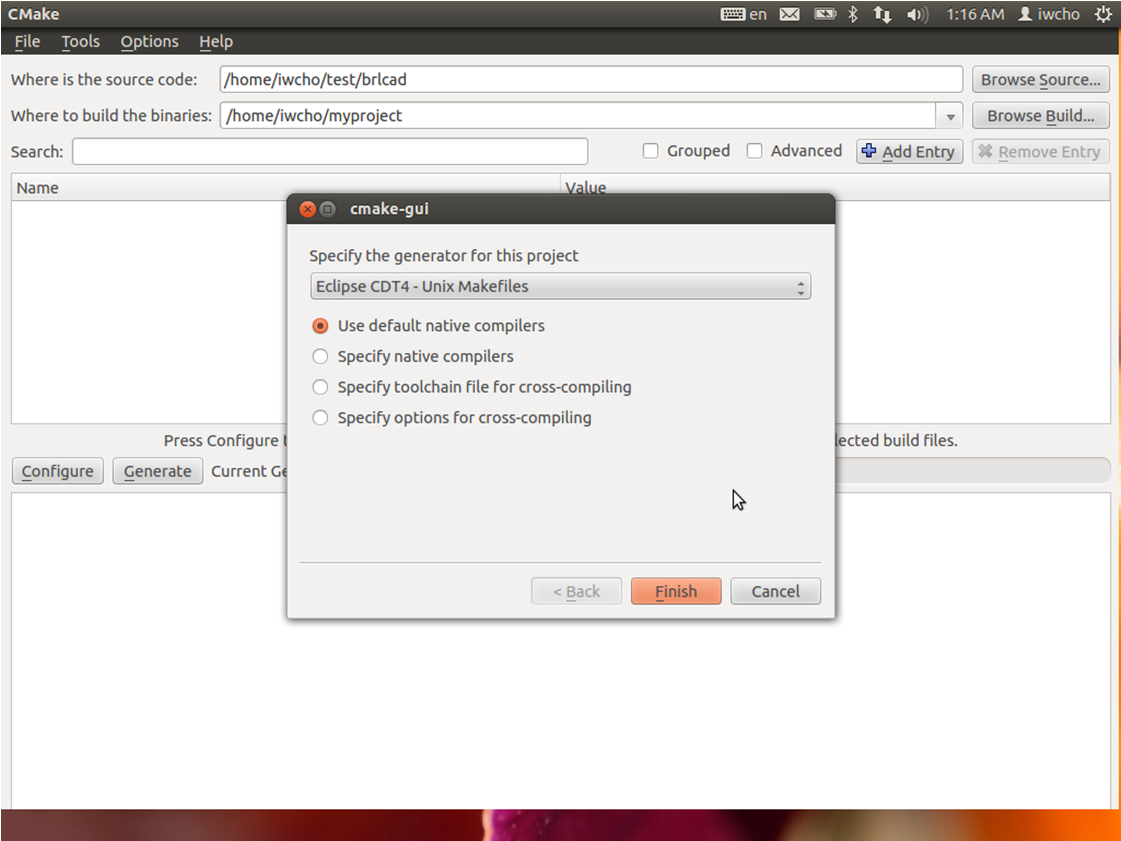
At first we need to run CMake, and set ”Where is the source code” and “Where to build the binaries”, but before that you have to be sure that you have a CMakeLists.txt file in the src directory . Your project name should be different from your executable name and different from your build folder name. Otherwise, Eclipse will NOT pick up your executable as you build them. Our second work is that to select the generator(the window cmake-gui appears when you click Generate), in our case – Eclipse.
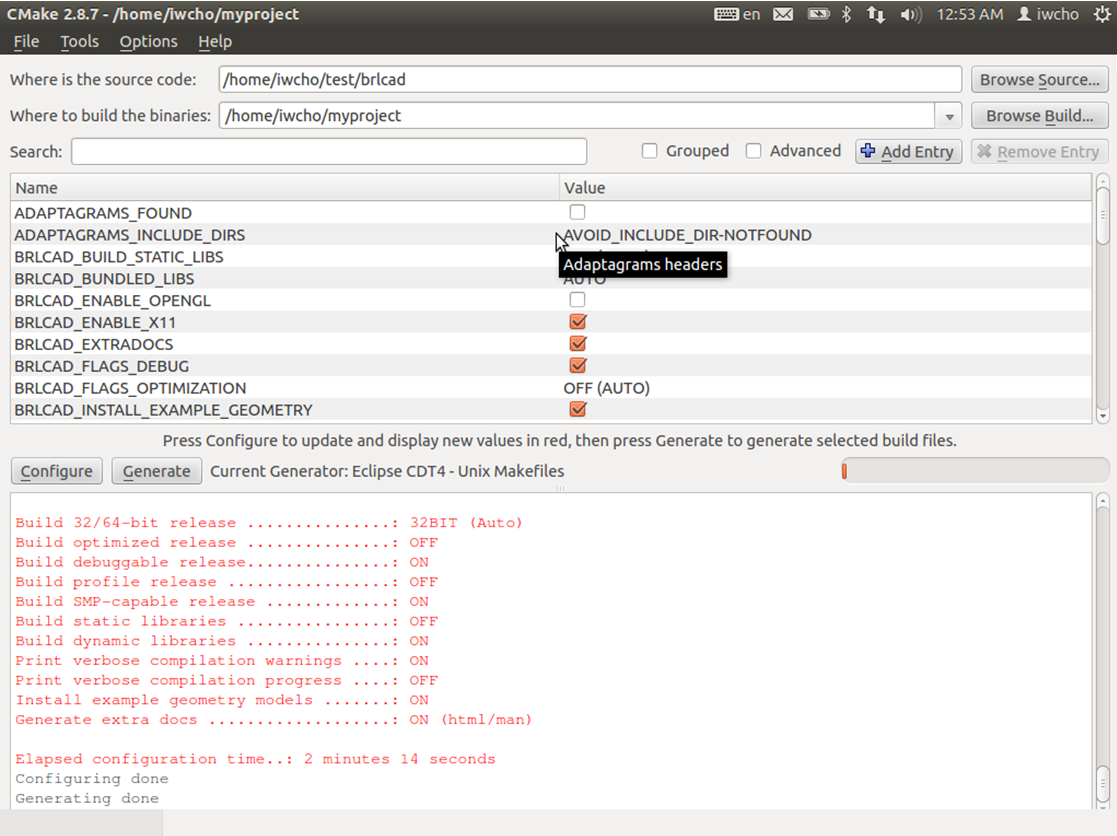
For Eclipse, it is important that the build directory not to be a subdirectory of the source directory due to a CMake limitation.
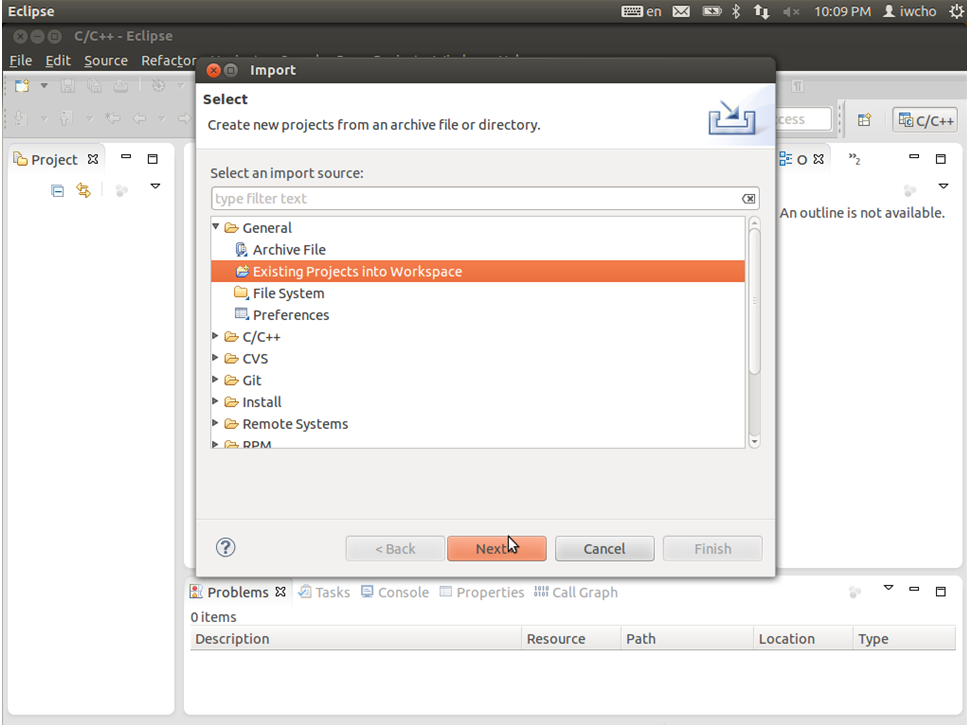
In the next step you have to run Eclipse and import your new project. File/Import/General/ Existing Projects into Workspace, Then just click Next.
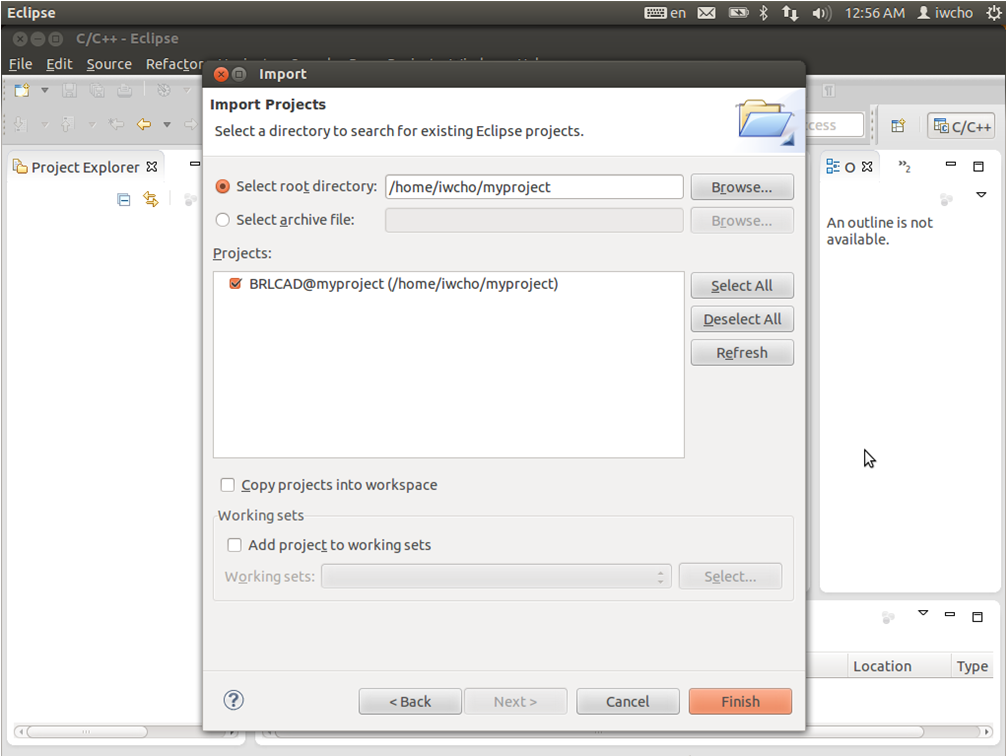
Here you have to Select root directory, then check your projects, keep "Copy projects into workspace" unchecked and Finish import.
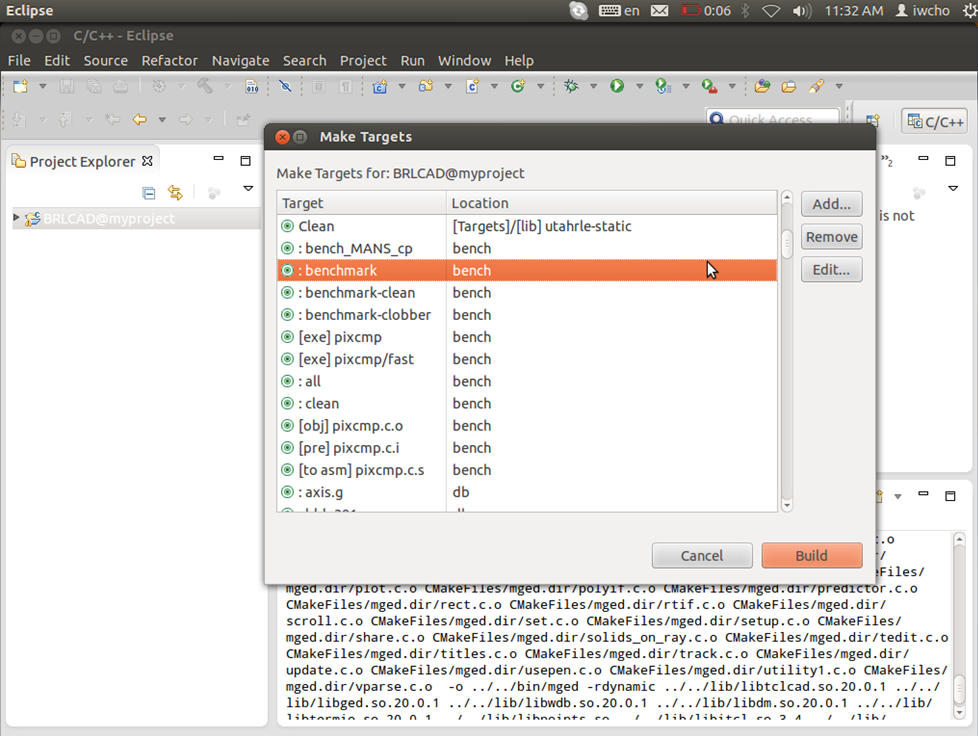
Next, we could build everything, but here we build pieces of the project with the benchmark and mged targets. First, the BRL-CAD benchmark: Project/Make Target/Build..., then select target:benchmark(location bench) and click Build
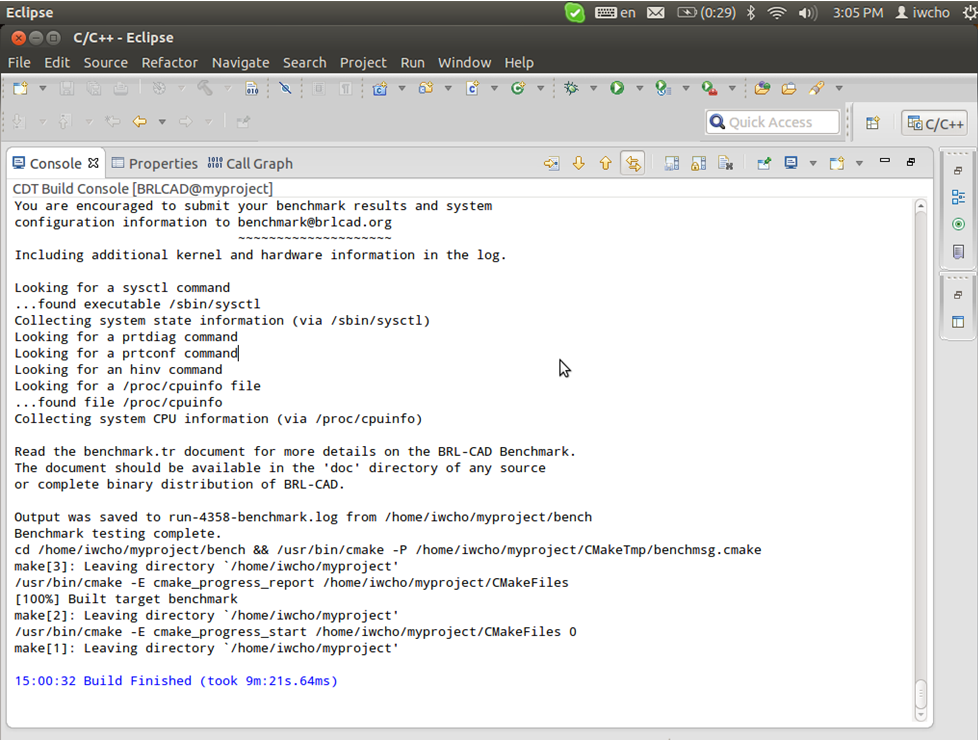
Already built project:
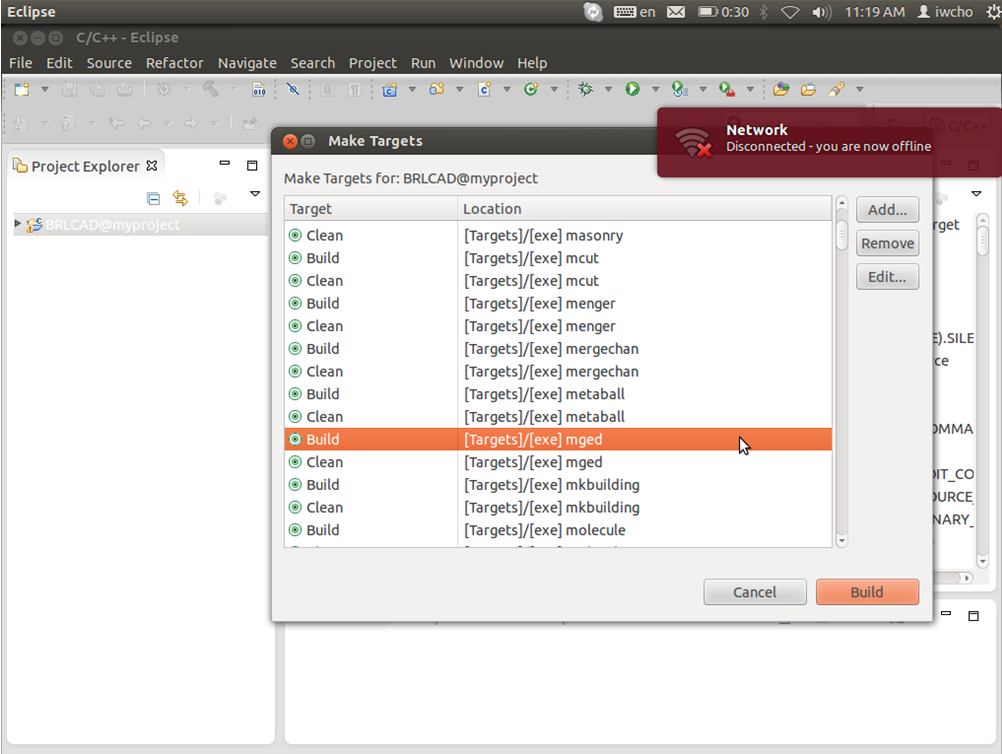
Now in analog of benchmark we will make it with MGED and will run it. Let’s choose the target...
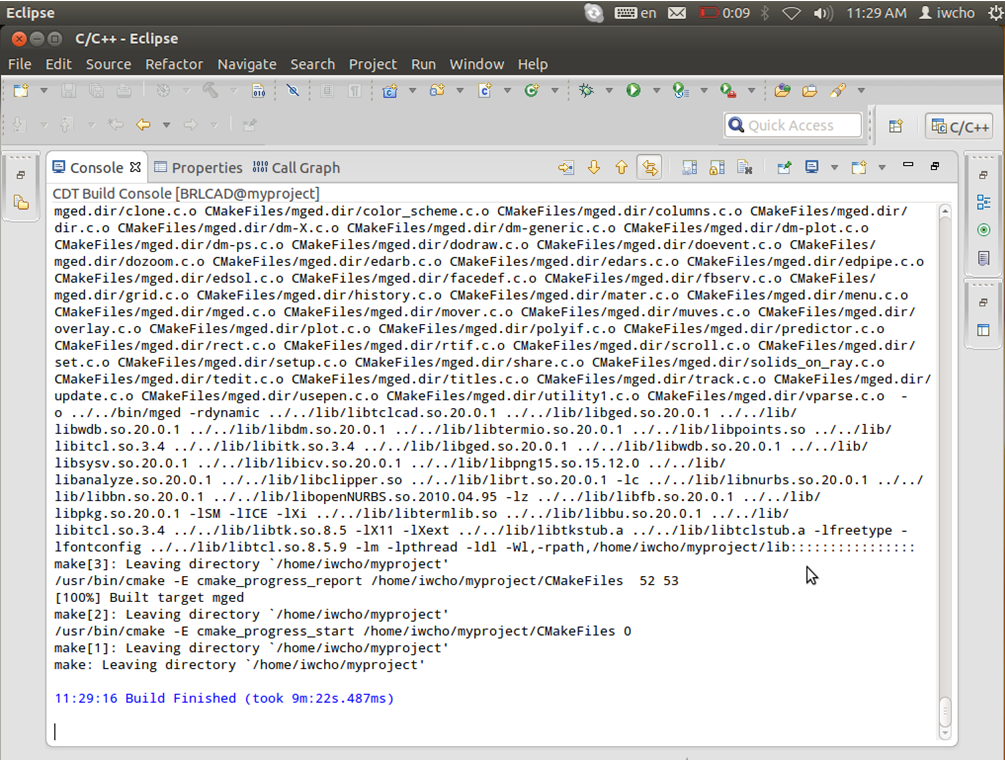
And the built project:
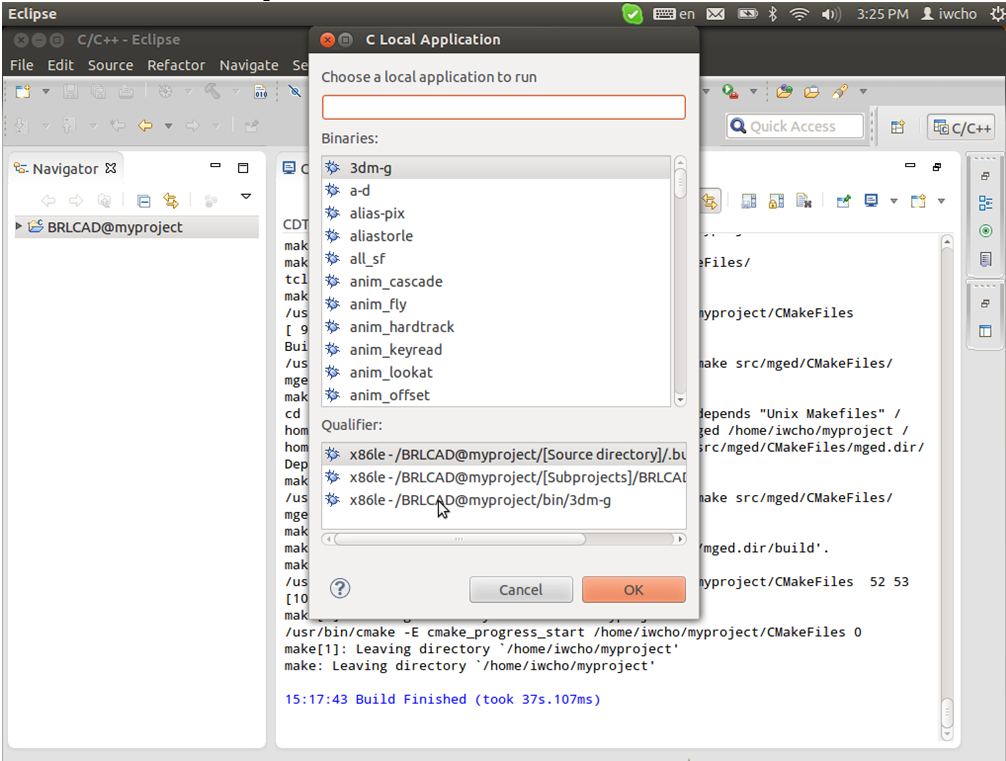
So let’s run it and choose mged from binaries and then click OK.
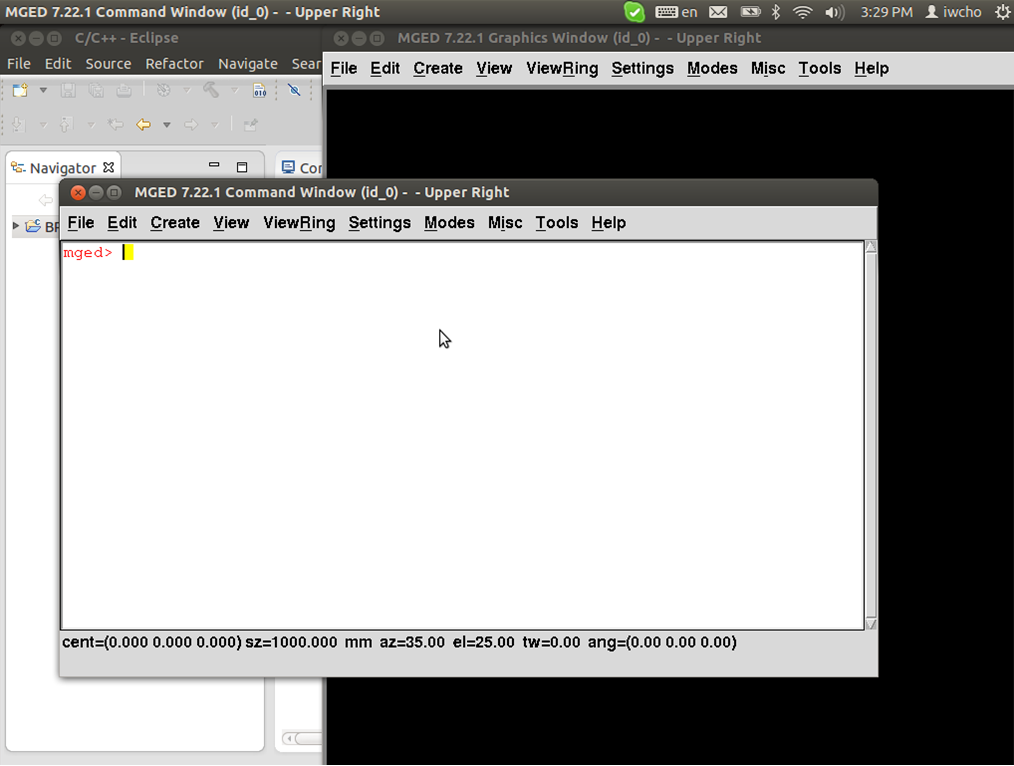
And finally we have started MGED:
