Difference between revisions of "Help:Images"
m (1 revision(s)) |
m (1 revision(s)) |
||
| (One intermediate revision by one other user not shown) | |||
| Line 1: | Line 1: | ||
| + | {{PD Help Page}} | ||
| + | |||
| + | This page explains the image syntax when editing the wiki. Before using images, you must {{mediawiki|Manual:Configuring file uploads|configure file uploads}} and [[Help:Managing files|upload a file]]. | ||
| + | |||
__TOC__ | __TOC__ | ||
{| {{Prettytable}} | {| {{Prettytable}} | ||
| Line 33: | Line 37: | ||
| | | | ||
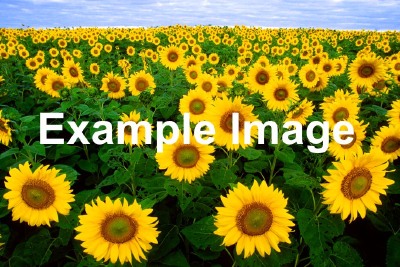
[[Image:Example.jpg|center|thumb|100px|Sunflowers]] | [[Image:Example.jpg|center|thumb|100px|Sunflowers]] | ||
| + | |- | ||
| + | |Border<br /> (100 pixels) <br /> Results in a very small gray border | ||
| + | <!-- Note: because the fine gray border can not be seen when used on the "Sunflowers"-image an image is used with a withe background --> | ||
| + | | | ||
| + | <code><nowiki>[[Image:Wiki.png|border|100px]]</nowiki></code> | ||
| + | | | ||
| + | [[Image:Wiki.png|border|100px]] | ||
| + | |- | ||
| + | |Frameless<br />Like thumbnail, respect user preferences for image width but without border and no right float. | ||
| + | | | ||
| + | <code><nowiki>[[Image:Example.jpg|frameless]]</nowiki></code> | ||
| + | | | ||
| + | [[Image:Example.jpg|frameless]] | ||
|} | |} | ||
| − | == | + | == Syntax == |
| − | |||
| − | |||
| − | |||
| − | |||
| − | |||
| − | |||
| − | |||
| − | |||
| − | |||
| − | |||
| − | |||
| − | |||
| − | |||
| − | |||
The full syntax for displaying an image is: | The full syntax for displaying an image is: | ||
<code><nowiki>[[Image:{name}|{options}]]</nowiki></code> | <code><nowiki>[[Image:{name}|{options}]]</nowiki></code> | ||
| Line 57: | Line 60: | ||
*<code>{width}px</code>: Resizes the image to the given width in pixels | *<code>{width}px</code>: Resizes the image to the given width in pixels | ||
*<code>{caption text}</code> | *<code>{caption text}</code> | ||
| + | * Special cases: | ||
| + | ** <code>page=1</code>: displays the specified page when showing a djvu file. | ||
| + | |||
The options can be given in any order. If a given option does not match any of the other possibilities, it is assumed to be the caption text. Caption text can contain wiki links or other formatting. | The options can be given in any order. If a given option does not match any of the other possibilities, it is assumed to be the caption text. Caption text can contain wiki links or other formatting. | ||
| − | ===Gallery of images | + | == Other files == |
| + | You can link to an external file using the same syntax used for linking to an external web page. | ||
| + | *<code><nowiki>[http://url.for/some/image.png]</nowiki></code> | ||
| + | Or with different text: | ||
| + | *<code><nowiki>[http://url.for/some/image.png link text here]</nowiki></code> | ||
| + | |||
| + | If it is enabled on your wiki (see [[Manual:$wgAllowExternalImages]]), you can also embed external images. To do that, simply insert the image's url: | ||
| + | *<code><nowiki>http://url.for/some/image.png</nowiki></code> | ||
| + | |||
| + | == Gallery of images == | ||
It's easy to make a gallery of thumbnails with the <code><nowiki><gallery></nowiki></code> tag. The syntax is: | It's easy to make a gallery of thumbnails with the <code><nowiki><gallery></nowiki></code> tag. The syntax is: | ||
<pre> | <pre> | ||
| Line 89: | Line 104: | ||
</gallery> | </gallery> | ||
| − | == | + | == Administration of images/files == |
| − | + | ||
| − | * | + | See: [[Manual:Image Administration]] |
| − | + | ||
| − | * | + | == See also == |
| + | * [[Help:Linked images|Linked images]] | ||
| + | * [[Manual:Non-clickable_Images|Making images non-clickable]] | ||
| + | |||
| + | ==External Links== | ||
| + | * {{meta|Help:Images and other uploaded files}} | ||
| + | * http://en.wikipedia.org/wiki/Wikipedia:Extended_image_syntax | ||
| − | + | {{Languages|Help:Images}} | |
| − | |||
[[Category:Help|Images]] | [[Category:Help|Images]] | ||
Latest revision as of 22:15, 24 April 2008
| Important note: When you edit this page, you agree to release your contribution into the public domain. If you don't want this or can't do this because of license restrictions, please don't edit. This page is one of the Public Domain Help Pages, which can be freely copied into fresh wiki installations and/or distributed with MediaWiki software; see Help:Contents for an overview of all pages. |
This page explains the image syntax when editing the wiki. Before using images, you must Template:Mediawiki and upload a file.
Contents
| Description | You type | You get |
| Embed image (with alt text) |
|
|
| Link to description page |
|
|
| Link directly to file |
|
|
| Thumbnail (centered, 100 pixels wide, with caption) |
|
|
| Border (100 pixels) Results in a very small gray border |
|
|
| Frameless Like thumbnail, respect user preferences for image width but without border and no right float. |
|
|


Syntax[edit]
The full syntax for displaying an image is:
[[Image:{name}|{options}]]
Where options can be zero or more of the following, separated by pipes:
thumb,thumbnail, orframe: Controls how the image is formattedleft,right,center,none: Controls the alignment of the image on the page{width}px: Resizes the image to the given width in pixels{caption text}- Special cases:
page=1: displays the specified page when showing a djvu file.
The options can be given in any order. If a given option does not match any of the other possibilities, it is assumed to be the caption text. Caption text can contain wiki links or other formatting.
Other files[edit]
You can link to an external file using the same syntax used for linking to an external web page.
[http://url.for/some/image.png]
Or with different text:
[http://url.for/some/image.png link text here]
If it is enabled on your wiki (see Manual:$wgAllowExternalImages), you can also embed external images. To do that, simply insert the image's url:
http://url.for/some/image.png
Gallery of images[edit]
It's easy to make a gallery of thumbnails with the <gallery> tag. The syntax is:
<gallery>
Image:{filename}|{caption}
Image:{filename}|{caption}
{...}
</gallery>
Captions are optional, and may contain wiki links or other formatting.
for example:
<gallery>
Image:Example.jpg|Item 1
Image:Example.jpg|a link to [[Help:Contents]]
Image:Example.jpg
Image:Example.jpg
Image:Example.jpg|''italic caption''
</gallery>
is formatted as:
Item 1
a link to Help:Contents
italic caption
Administration of images/files[edit]
See: Manual:Image Administration